> For the complete documentation index, see [llms.txt](https://docs.antares.id/llms.txt). Markdown versions of documentation pages are available by appending `.md` to page URLs; this page is available as [Markdown](https://docs.antares.id/en/getting-started/installation-board-and-library/esp32.md).
# ESP32
This tutorial will explain the installation of the ESP32 board used in the Documentation on the Antares Platform.
## Installation Step
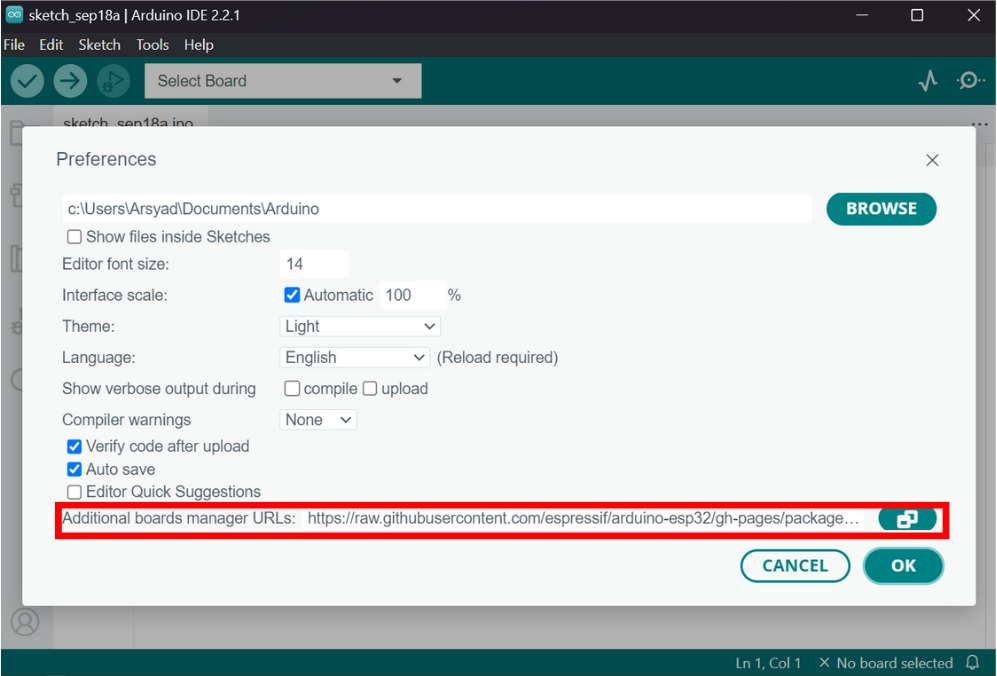
### 1. Open Arduino IDE , then click Files -> Preferences
### 2. Enter the following URL into Additional Board Manager URLs and click OK.
```
/https://raw.githubusercontent.com/espressif/arduino-esp32/gh-pages/package_esp32_index.json
```
{% hint style="info" %}
You can add multiple URLs by adding commas to separate them if needed.
```
URL1,URL2
example :
https://raw.githubusercontent.com/espressif/arduino-esp32/gh-pages/package_esp32_index.json,URL2
```
{% endhint %}
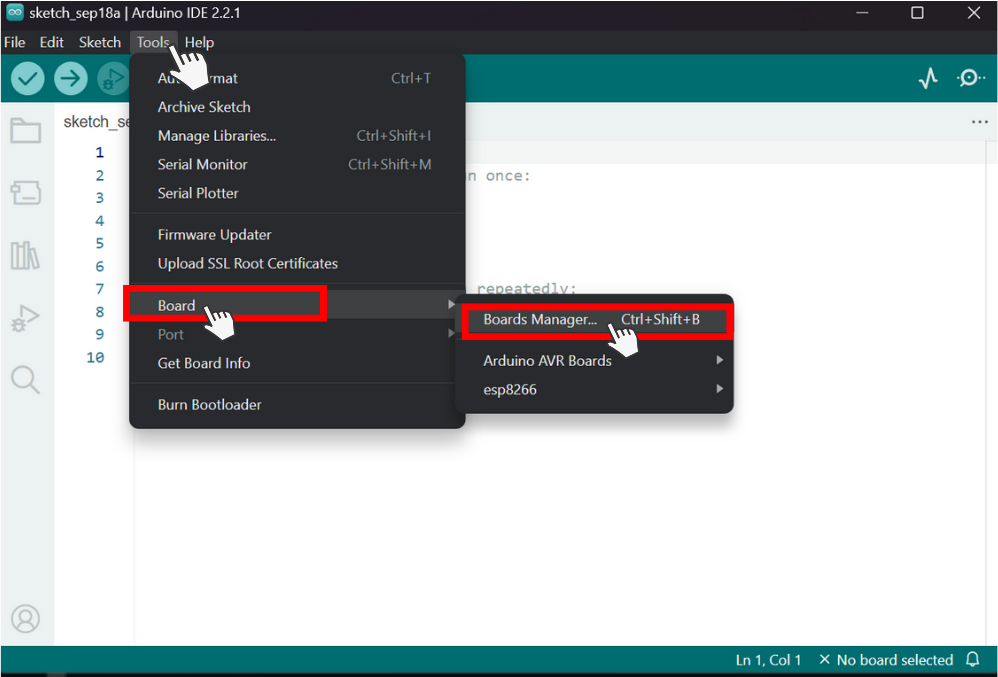
### 3. Click **Tools -> Board -> Boards Manager**
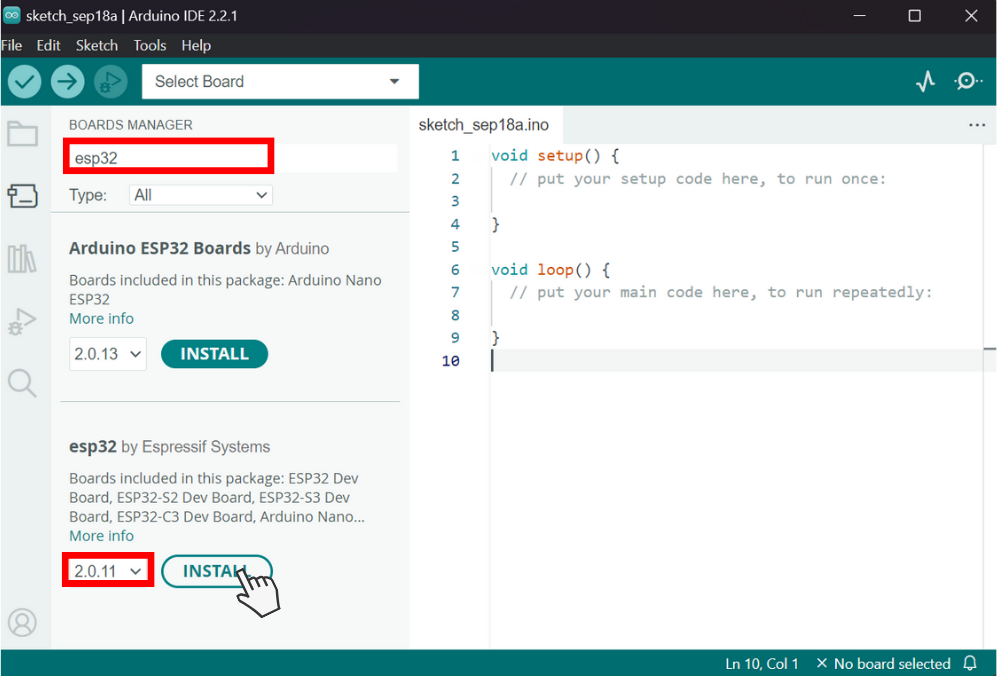
### 4. Enter keyword "esp32" in the search box to make it easier for you. If you have found esp32 by Espressif System, in the Antares documentation using version 2.0.11 and then click Install.
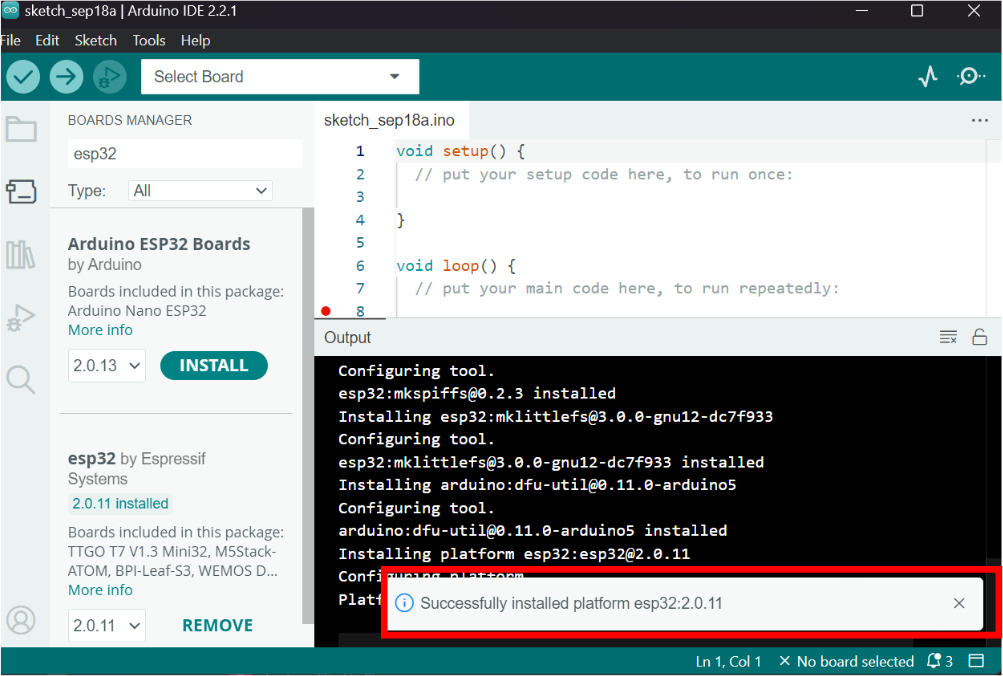
### 5. Wait a while for the installation to complete
.png)