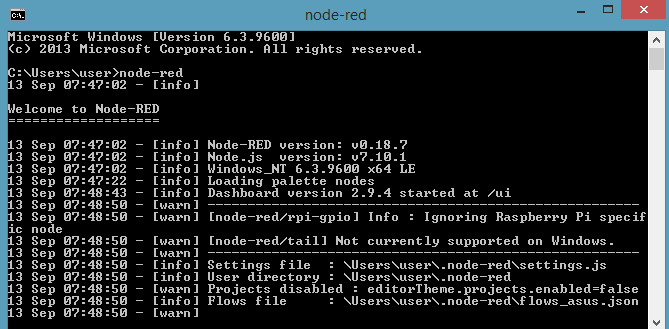
Node-RED is a programming tool for connecting hardware devices, APIs, and online services in new and exciting ways. Node-RED provides a browser-based editor that makes it easy for users to connect flows with extensive use of nodes in a palette that can be directly applied with one click[1]. Node-RED is shared with Antares, MQTT, and other platforms/protocols. Once installed, Node-RED can be run by typing "node-red" at the command prompt.
Running Node-RED
Users can type "localhost:1880" or "IPv4-address:1880" in the browser to access Node-RED.
Node-RED Parts
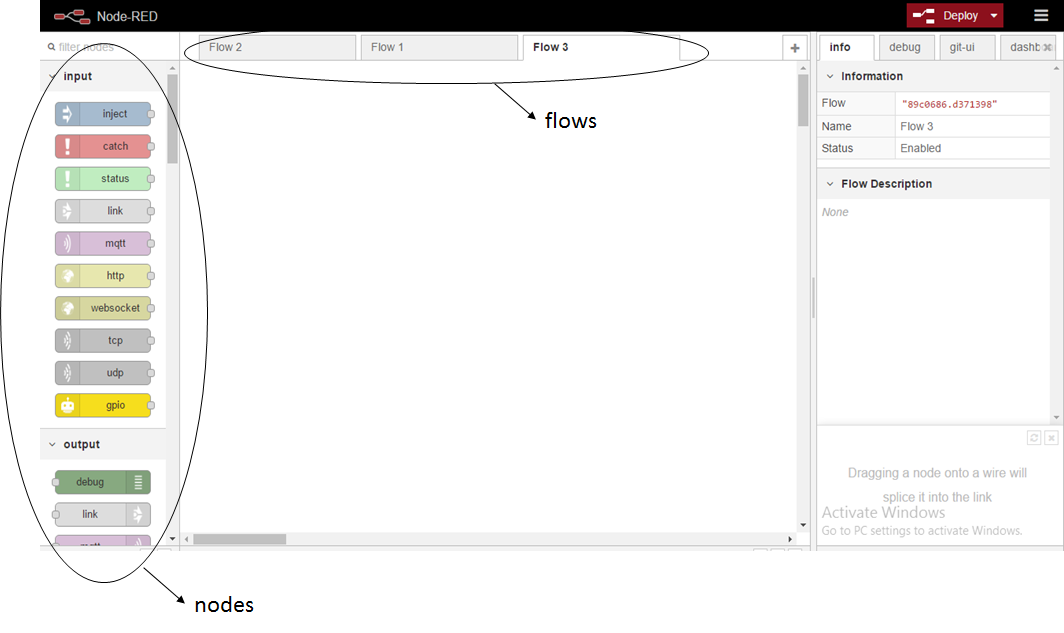
Parts of the RED Node
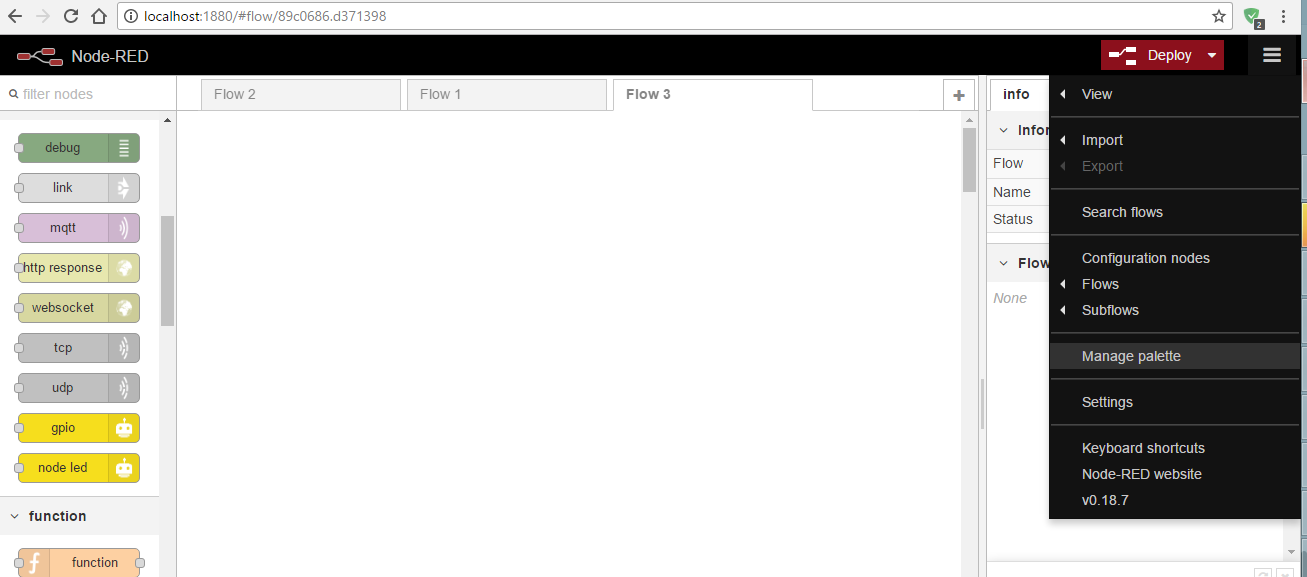
In Node-RED, there are sections called nodes and flows. Nodes are the parts that are used to create the programme. There are several types of nodes: input, output, function, and others. The nodes can be downloaded in the "Manage palette" menu.
"Manage Palette" Menu
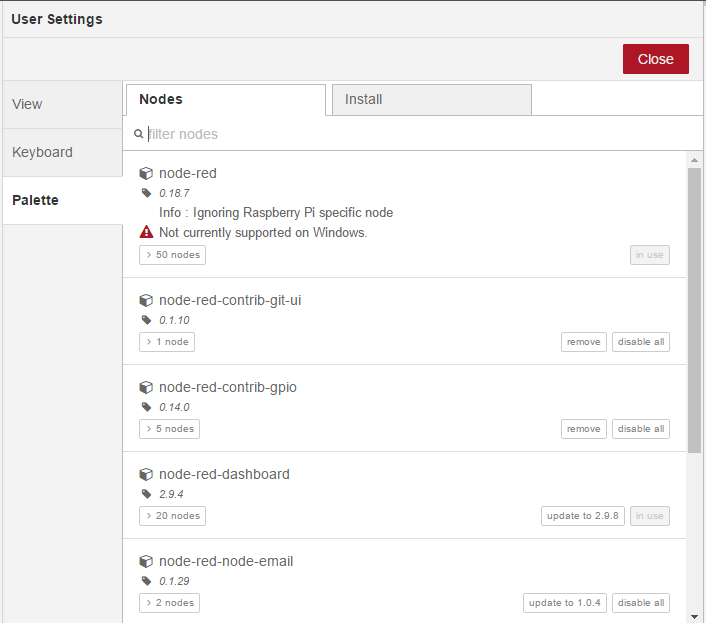
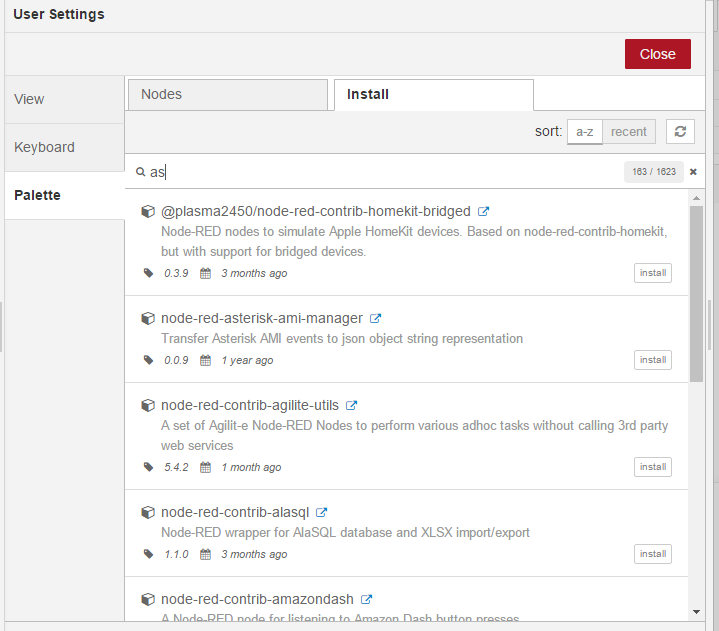
A window will appear. The "nodes" menu shows nodes that are already installed, while the "install" menu shows nodes that can be downloaded and installed.
"Nodes" and "Manage Palette" Menu
"Install" menu in "Manage Palette"
A flow is a place to attach nodes. In one Node-RED window, there can be more than one flow. Flows are independent of each other.
Using MQTT
A. Node MQTT
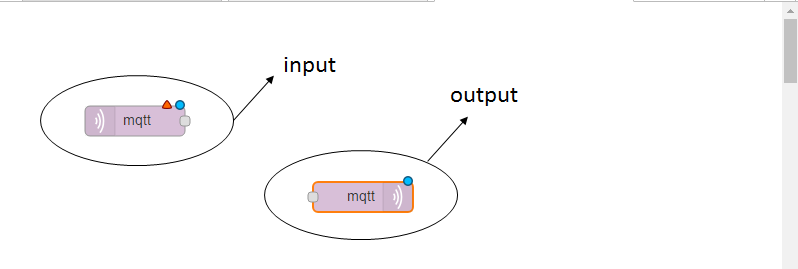
MQTT nodes are already installed during the installation of Node-RED. There are two types of MQTT nodes: MQTT input and MQTT output.
Gambar 6. Tipe Node MQTT
B. MQTT Broker Setup
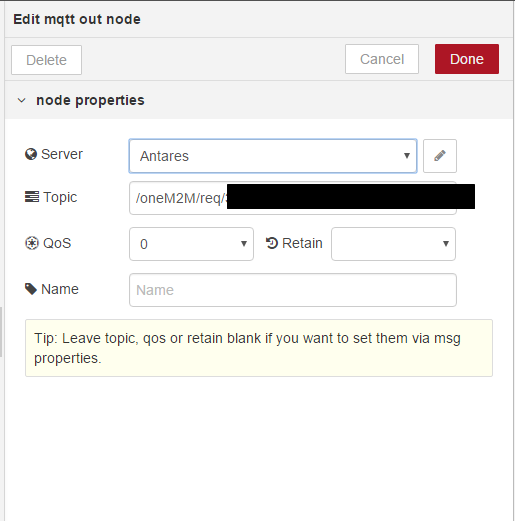
An MQTT node looks like this:
MQTT Node Settings
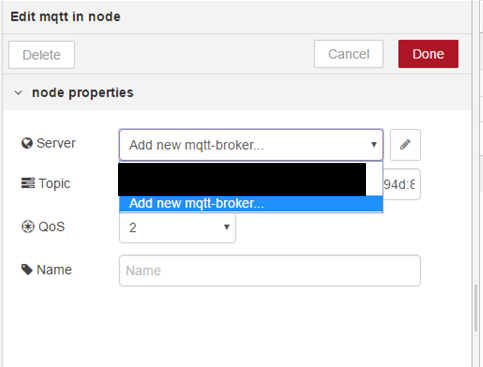
Adding a new broker can be done by selecting "add new mqtt-broker" and clicking on the right-hand icon. Setting up a broker can be done by simply clicking on the right-hand icon.
New Broker Additions
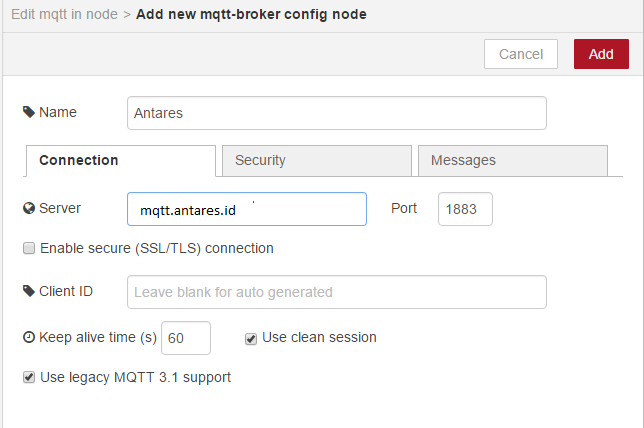
Users can name the new broker and set the server and port used.
New Broker Settings
C. Transmitting and Receiving Data
Simulation of input data from the device can be done with the use of the "inject" node.
Send Data
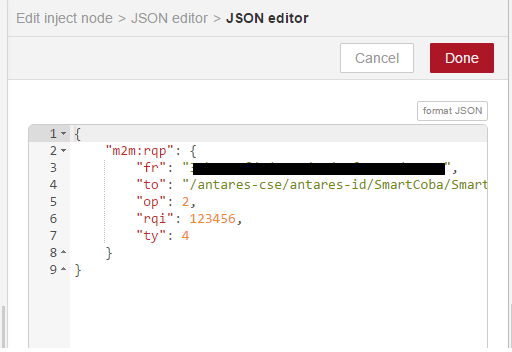
The "inject" node can be changed to provide another data type. In this case, the data type used is JSON.
Setting the "inject" Node
Programmes can be written by clicking on the "..." icon.
Programme Writing
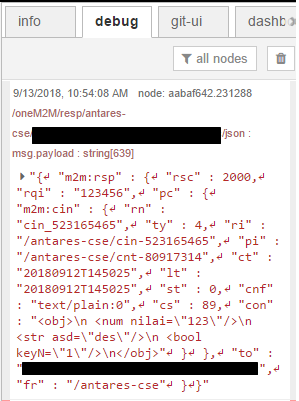
The "debug" node can be used to view the messages sent.
Receive Data
Users can view the received messages in the "debug" panel.