Temperature and Humidity Monitoring Using DHT11 Sensor
In this project, you will be directed to monitor temperature and humidity using a DHT11 sensor connected to a Raspberry Pi. Furthermore, the temperature and humidity data read by the DHT11 sensor will be sent to the Antares IoT Platform.
Prerequisites
The materials required follow the General Prerequisites on the previous page. If you have not prepared the requirements on that page, then you can visit the following page.
Here are some of the equipment you will need for temperature and humidity monitoring using the DHT11 Sensor:
Raspberry Pi
Sensor DHT11
Resistor 10kΩ
Breadboard
Kabel jumper (3 jumper jantan ke betina dan 3 jumper jantan ke jantan)
The 10kΩ resistor is needed as a pull-up resistor used to stabilise the communication between the DHT11 sensor and the Raspberry Pi. This resistor is needed when you work with DHT11 sensors that have 4 pins.
Equipment Required for Temperature and Humidity Monitoring
2. Assembling Hardware
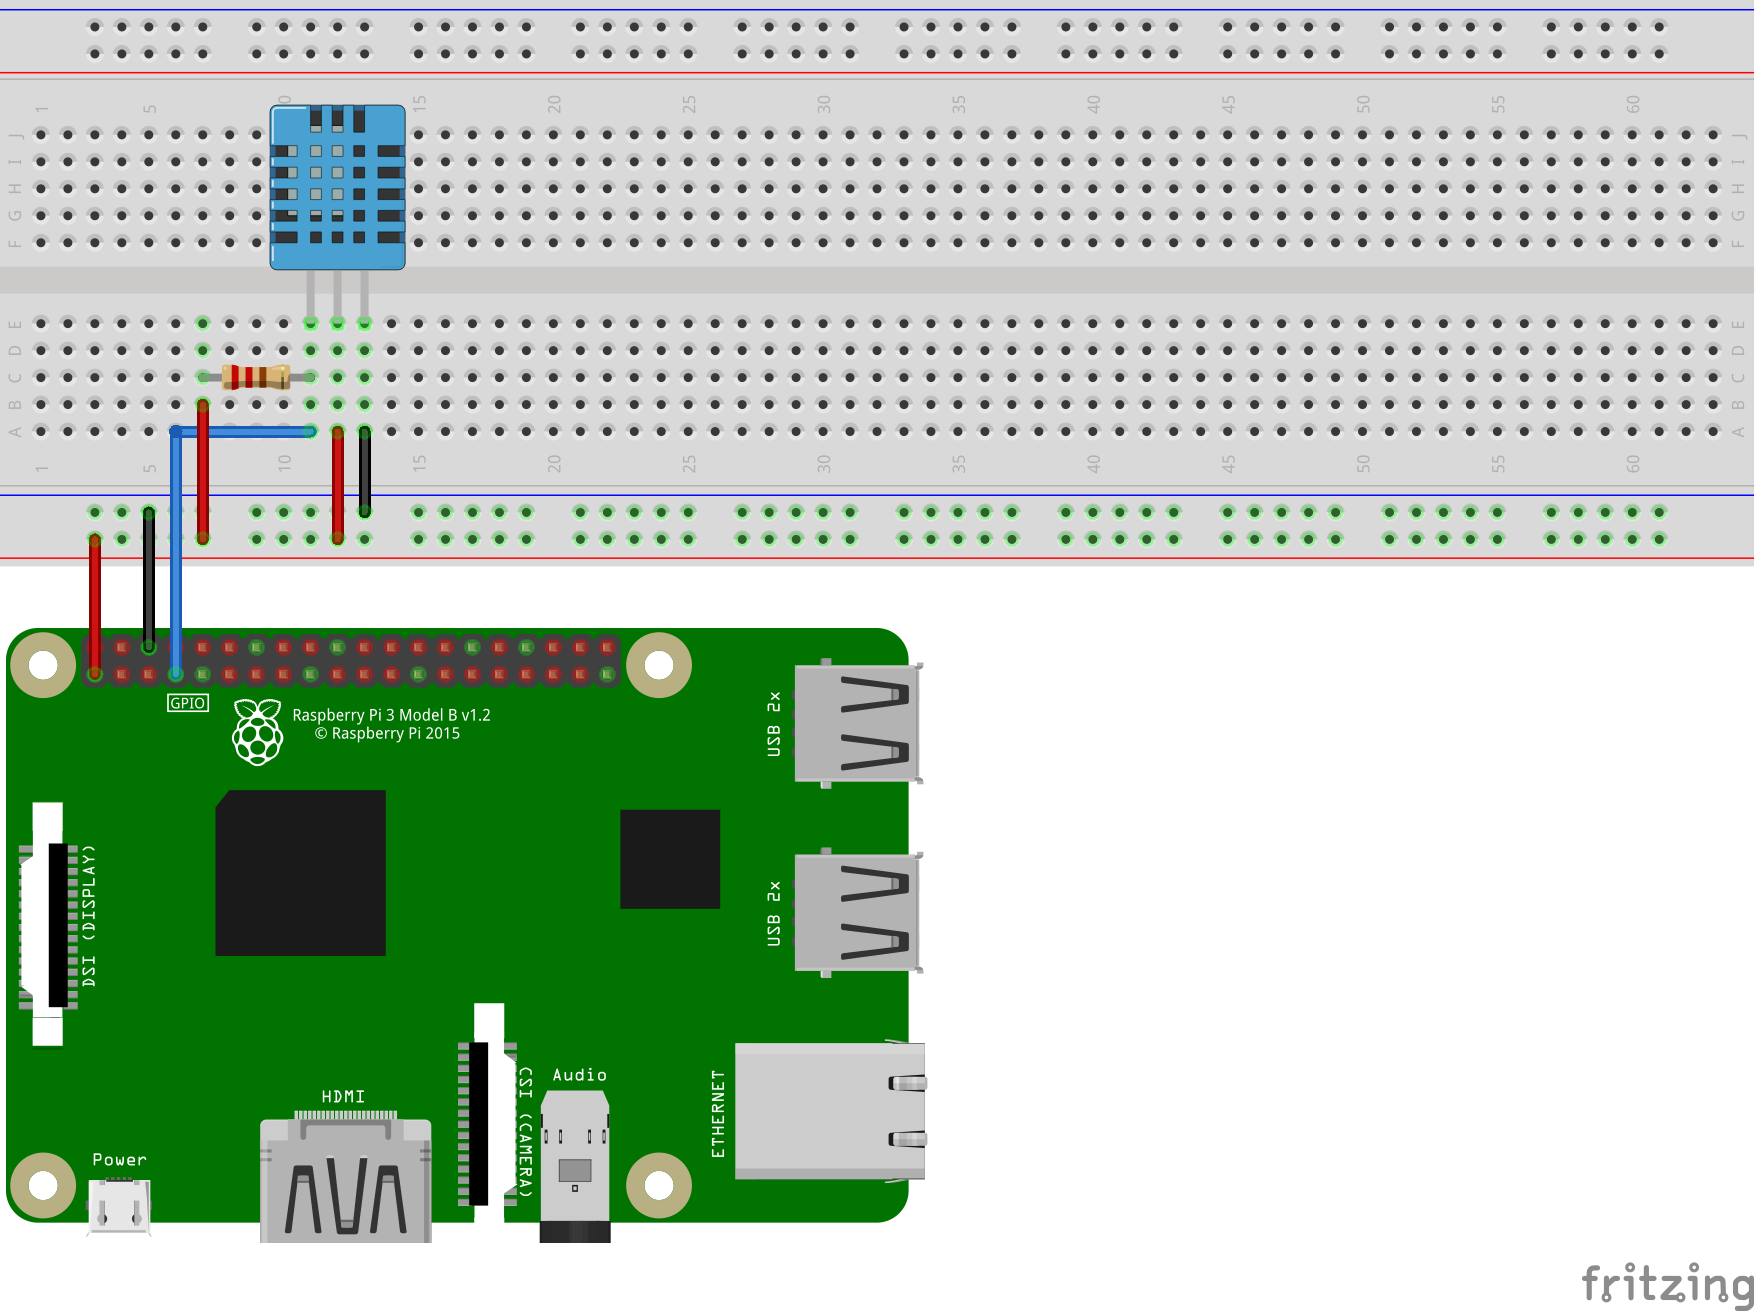
For temperature and humidity monitoring, you need to connect the DHT11 sensor with the Raspberry Pi. You need to create a circuit as in the following image.
Connect the DHT11 VCC pin to the Raspberry Pi's 3.3 V pin, the DHT11 GND pin to the Raspberry Pi GND pin, and the DHT11 data pin to the Raspberry Pi's GPIO 4. Finally, connect the end of the 10kΩ resistor to the DHT11 VCC pin and the other end to the DHT11 data pin.
DHT11 to Raspberry Pi circuit
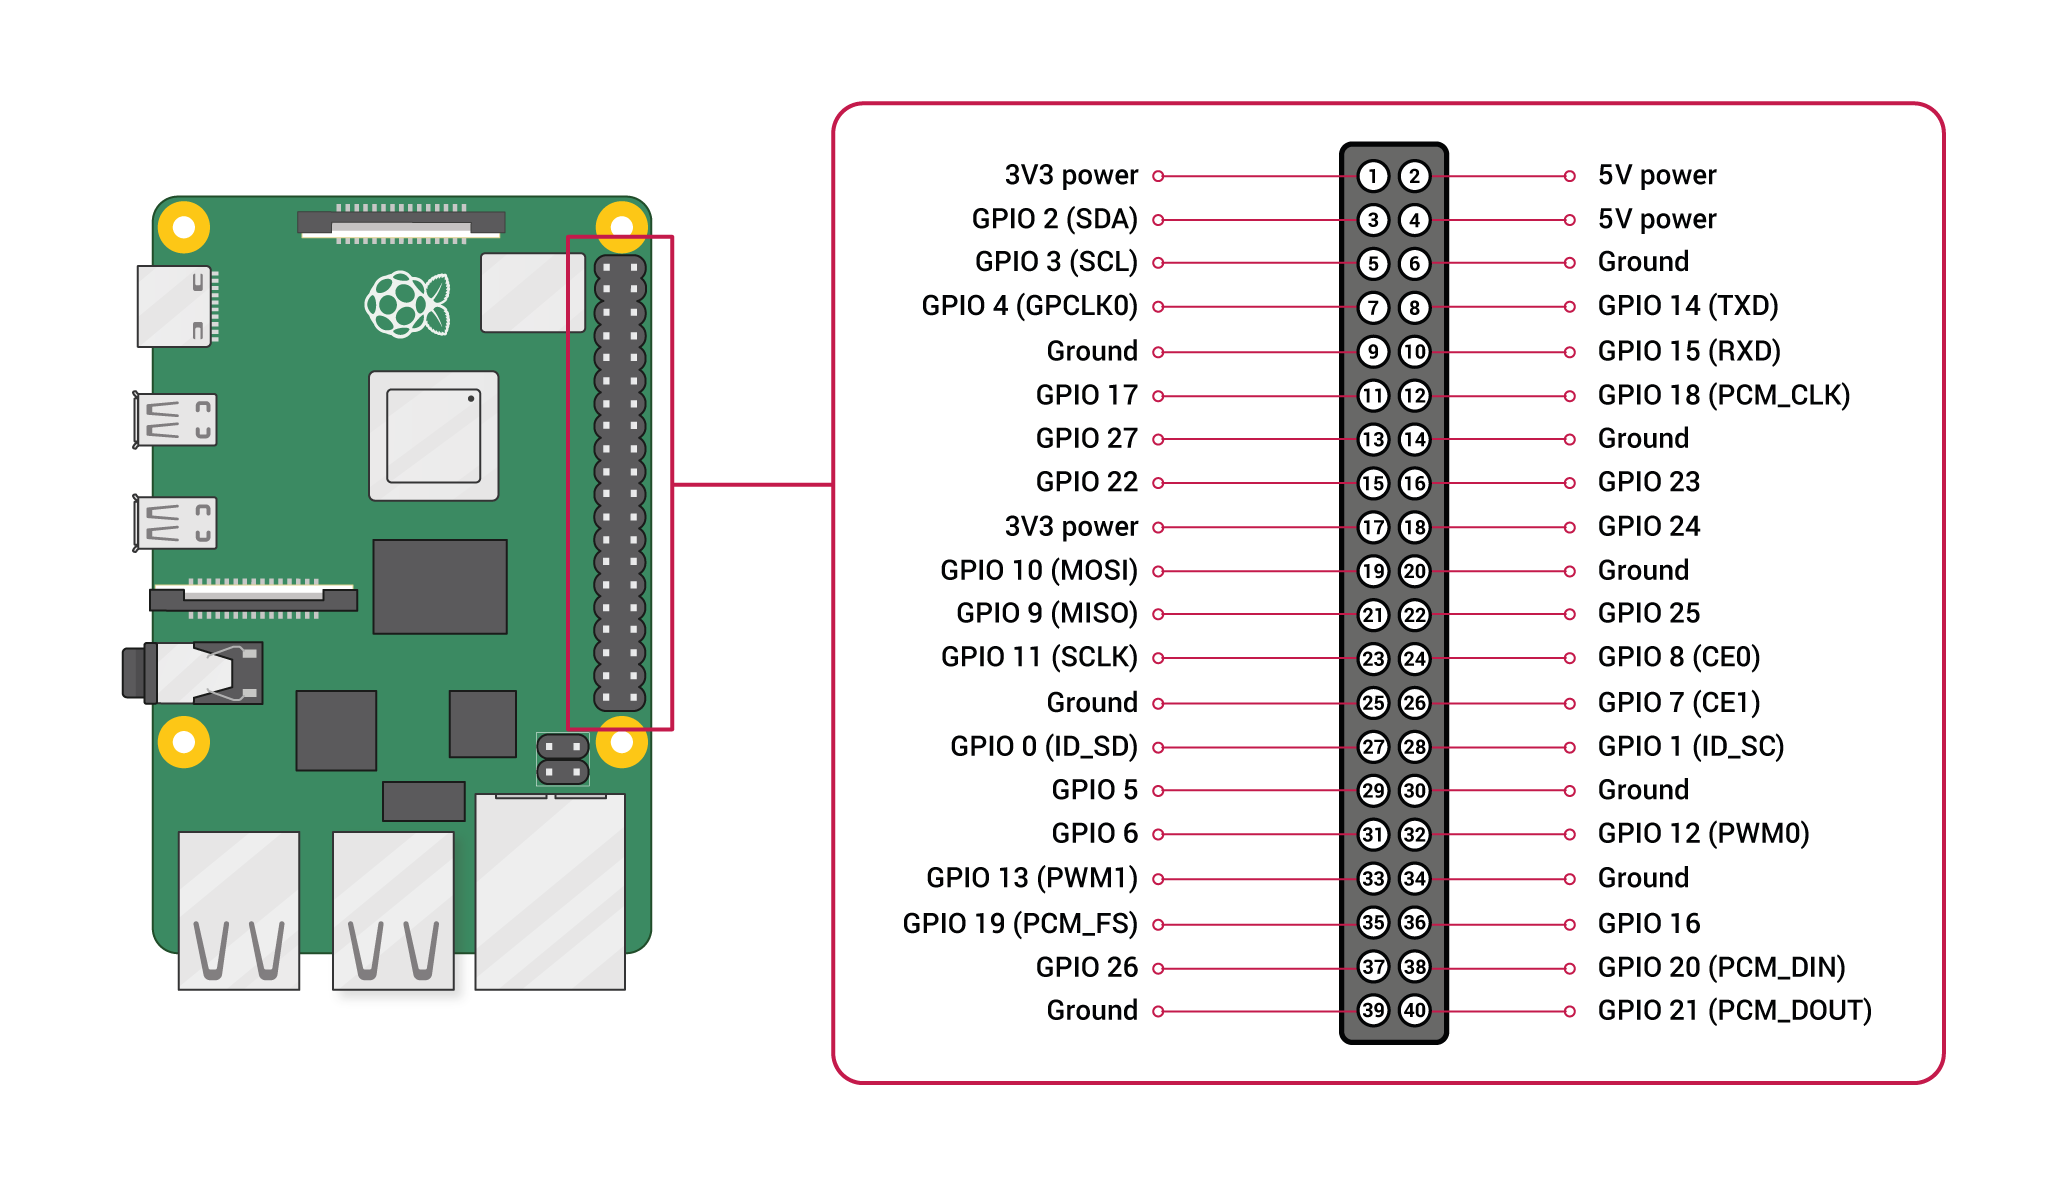
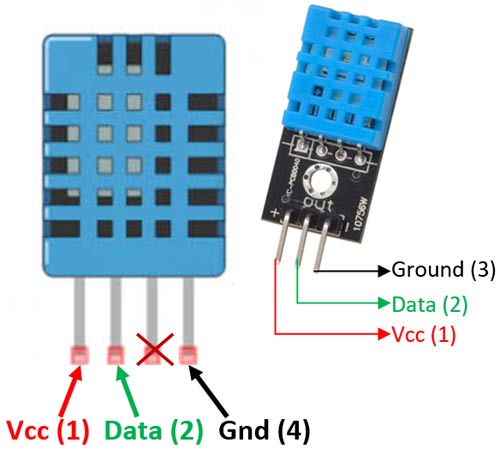
Here is a pinout diagram of the Raspberry Pi and DHT11 sensor that can make it easier for you to build a circuit.
Pinout Raspberry Pi
Pinout Sensor DHT11
3. Switching on the Raspberry Pi
You can switch on the Raspberry Pi by connecting it to a power source using USB-C.
A powered-on Raspberry Pi will be signalled by a lit LED indicator near the USB-C port.
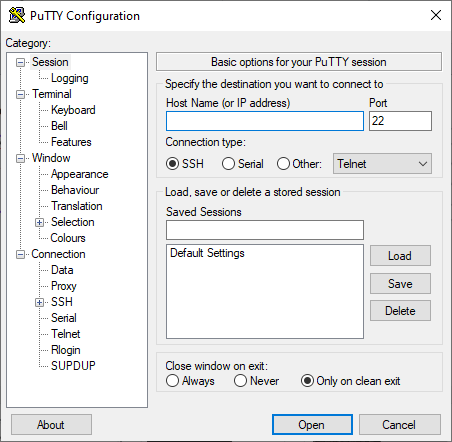
4.Open PuTTY App
The PuTTY application is used to access the Raspberry Pi via SSH. The image below shows the initial appearance of the application when opened.
PuTTY App View
5. Check Raspberry Pi Connection with WiFi Network
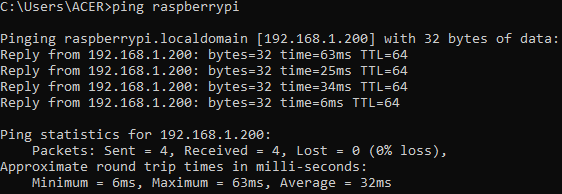
To connect the Raspberry Pi via SSH using the PuTTY application, you need to input the Host Name or IP Address of the Raspberry Pi. To check whether the Raspberry Pi is connected to a WiFi network, you can do the "ping" command to the Raspberry Pi hostname. Open a command prompt and enter the following syntax.
Ping to Raspberry Pi
If the ping process fails, then it is likely that the Raspberry Pi has not been connected to the WiFi network that was set up during the OS installation process. In this condition, what you can do is wait a few moments until ping can be done. If it still fails, you can restart the Raspberry Pi by unplugging and reconnecting the power source from USB.
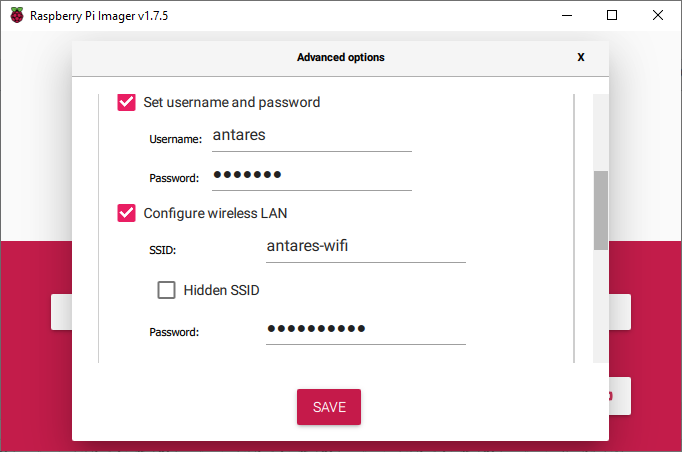
If the Raspberry Pi still cannot connect to the Wi-Fi network that you have set during the OS installation process, then the last step that can be done is to change the Wi-Fi network used by installing the OS again in the Configure Wireless LAN section as shown below.
Changing the WiFi Connection on Raspberry Pi
6. Access Raspberry Pi by SSH
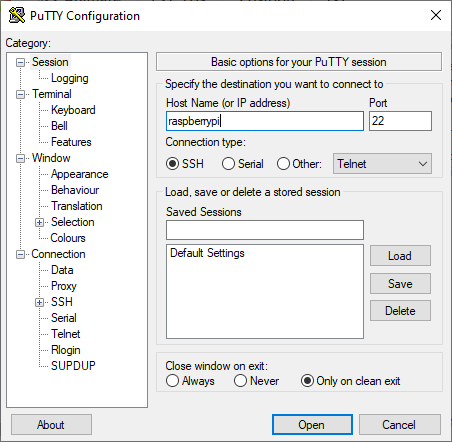
After ensuring that the Raspberry Pi can connect to our computer, then we can input the Raspberry Pi hostname in the PuTTY application as shown below, then press Open.
Inputting Host Name in PuTTY Application
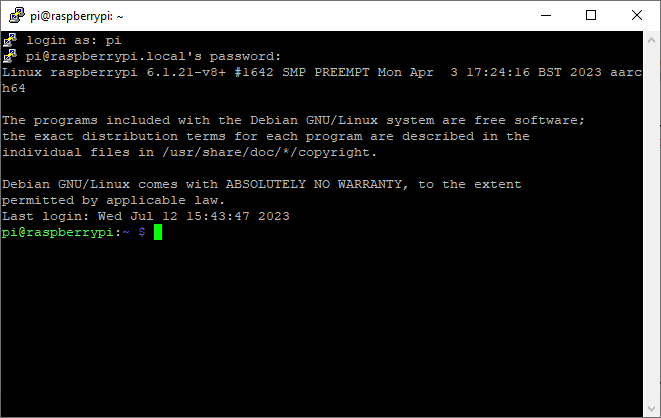
Select Accept in the display that appears, then enter the username and password in the terminal that opens. Input the username and password according to what was created during OS installation. After successfully logging in, the display on the terminal will be as follows.
Display of Raspberry Pi Terminal Accessed by SSH
7. Install Adafruit DHT11 Library
After you have successfully accessed the Raspberry Pi terminal, you need to install the DHT11 library from Adafruit by cloning from Github. The following syntax must be typed in the terminal.
After you have successfully accessed the Raspberry Pi terminal, you need to install the DHT11 library from Adafruit by cloning from Github. The following syntax must be typed in the terminal.
Adafruit_Python_DHT folder that appears after the cloning process
To install the DHT11 library, enter the Adafruit_Python_DHT folder by typing the following syntax.
Once inside the folder, you can check the files inside by typing "ls" in the terminal.
Enter the Adafruit_Python_DHT Folder and Display the Folder Contents
In the terminal output above there is a setup.py file. This file is used to install the DHT11 library.
Type the syntax below to perform the installation.
8. Creating a Python File
After successfully installing the required libraries, you need to create a Python file to input the required programme code. You need to enter the examples directory by typing the following syntax.
Enter the Examples Directory
Then you need to create a new Python file by typing the syntax below.
You need to change your-file-name to your preferred filename.
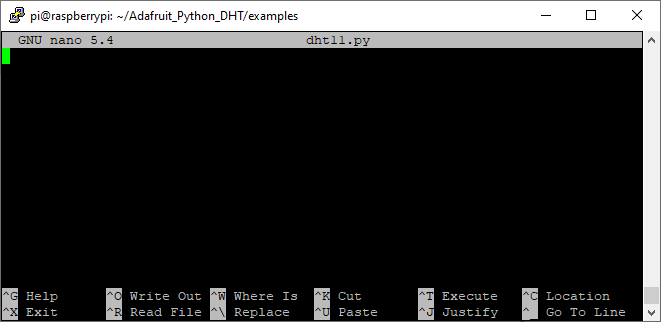
After that, the display on the terminal will change to the one shown below. In this view, you can start inputting the programme code required for temperature and humidity monitoring.
Empty Python file for writing programme code
The display above shows an empty Python file ready to be input with programme code.
9. Inputting Programme Code
Here is the programme code that you need to input to the Python file that you created earlier.
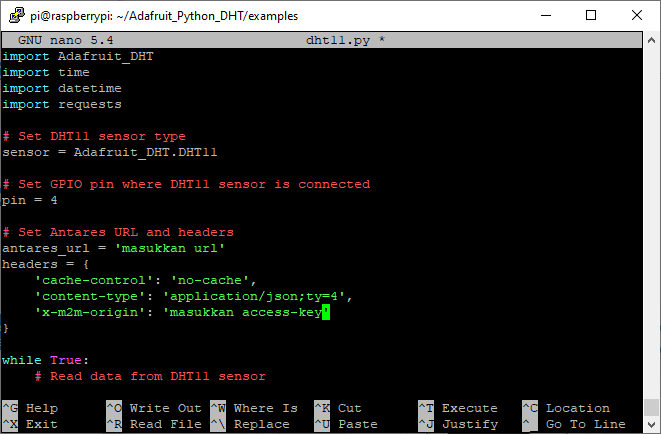
Don't forget to enter the device URL in the antares_url section and the access-key in the x-m2m-origin section according to the Antares IoT Platform. Make sure there are no programme writing errors and pay attention to the indentation.After successfully inputting the programme code, the display will be as shown below.
Program Code that has been Inputted to Python File
After you have successfully inputted the programme code, next you need to save the Python file by pressing Ctrl + X > Y > Enter.
10. Executing Python Files
After the Node.js Request file has been successfully saved. Next you can execute the file by typing the following syntax in the terminal.
Don't forget to change your-file-name according to the name created earlier.
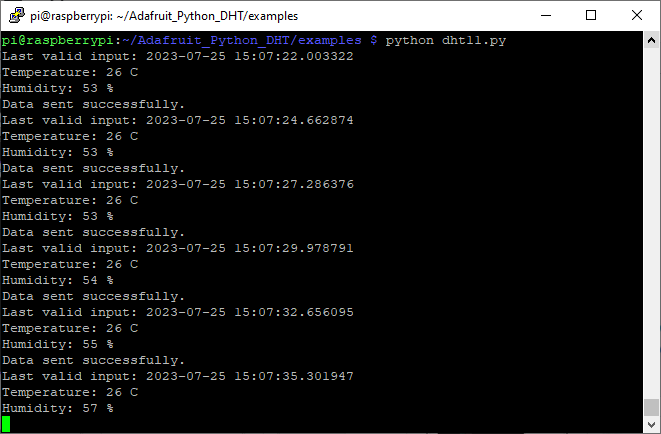
After the Python file is executed, the display on the terminal will be as shown below.
Terminal Output when Python FIle is Executed
The image above shows that the DHT11 sensor has been able to read the temperature and humidity data. The data has also been successfully sent to the Antares IoT Platform with the message "Data sent successfully"
11. Check Data on Antares IoT Platform
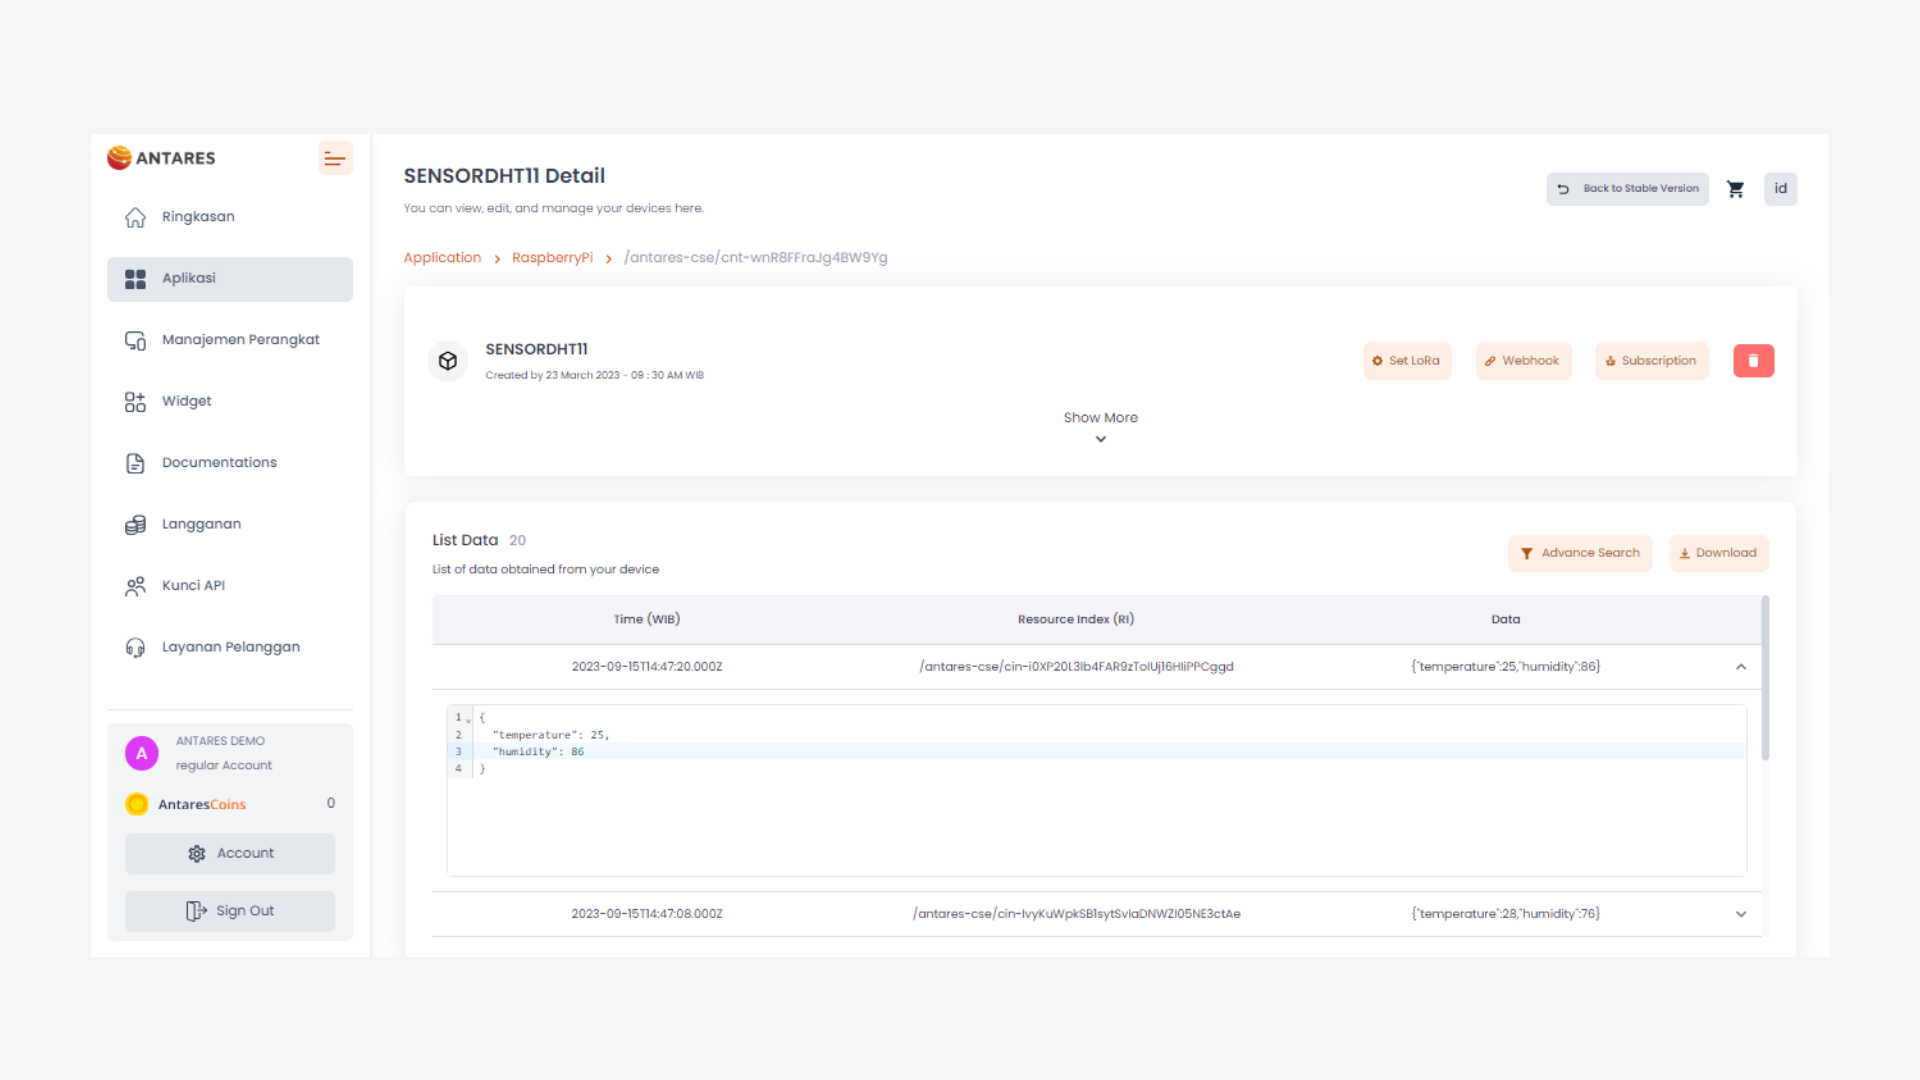
To ensure that the temperature and humidity data has been sent to the Antares IoT Platform, you can open your device URL. The following image shows the display on the Antares IoT Platform that has received data from the Raspberry Pi.
Display on Antares IoT Platform that has Received Data from Raspberry Pi
import Adafruit_DHT
import time
import datetime
import requests

# Set DHT11 sensor type
sensor = Adafruit_DHT.DHT11

# Set GPIO pin where DHT11 sensor is connected
pin = 4

# Set Antares URL and headers
antares_url = 'masukkan URL'
headers = {
    'cache-control': 'no-cache',
    'content-type': 'application/json;ty=4',
    'x-m2m-origin': 'masukkan access-key'
}

while True:
    # Read data from DHT11 sensor
    humidity, temperature = Adafruit_DHT.read_retry(sensor, pin)

    if humidity is not None and temperature is not None:
        print("Last valid input: " + str(datetime.datetime.now()))
        print("Temperature: %d C" % temperature)
        print("Humidity: %d %%" % humidity)

        # Create the data payload
        data = {
            "m2m:cin": {
                "con": "{\"Temperature\":%d,\"Humidity\":%d}" % (temperature, humidity)
            }
        }

        # Send the data to Antares
        try:
            response = requests.post(antares_url, headers=headers, json=data)
            response.raise_for_status()  # Check if the request was successful
            print('Data sent successfully.')
        except requests.exceptions.RequestException as e:
            print('Failed to send data:', e)

    else:
        print('Failed to get reading. Try again!')

    # Wait for 2 seconds before the next reading
    time.sleep(2)